Xcode 10 の Scene Editor で Metal のカスタムシェーダーを設定する
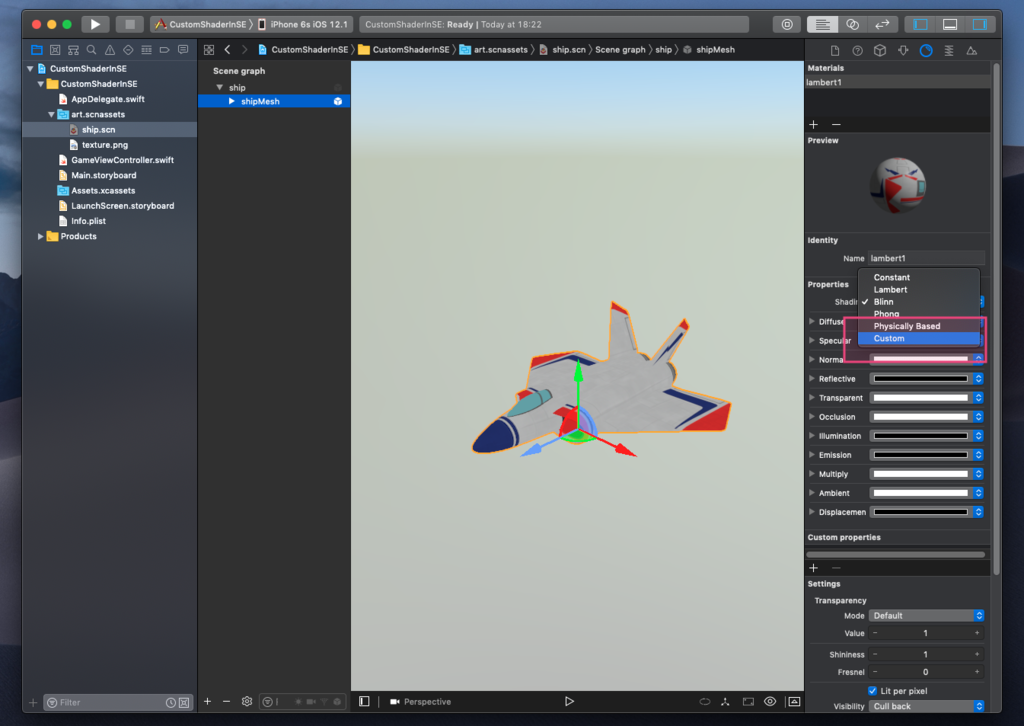
Xcode の多分 10.1 から Metal のシェーダーファイルを Material Inspetor > Propaties > Shading で設定できるようになった。

内容的には SCNProgram が Scene Editor でできるようになった感じ。
Metal のカスタムシェーダーファイルを作成する
新規ファイル(Command + N)で Metal File をつくるか、
.metal の拡張子を持つテキストファイルを作成して以下のものを書く。
内容的にはテクスチャを表示するだけのもの。
#include <metal_stdlib>
using namespace metal;

#include <SceneKit/scn_metal >

// 頂点
struct VertexInput {
    float3 position [[ attribute(SCNVertexSemanticPosition) ]];
    float2 texcoord [[ attribute(SCNVertexSemanticTexcoord0) ]];
};

// モデル
struct NodeBuffer {
    float4x4 modelViewProjectionTransform;
};

// 変数
struct CustomBuffer {
    float4 color;
};

struct VertexOut {
    float4 position [[ position ]];
    float2 texcoord;
    float4 color;
};

vertex VertexOut textureVertex(VertexInput in [[ stage_in ]],
                               constant SCNSceneBuffer& scn_frame [[ buffer(0) ]],
                               constant NodeBuffer& scn_node [[ buffer(1) ]],
                               constant CustomBuffer& custom [[ buffer(2) ]]) {
    VertexOut out;
    out.position = scn_node.modelViewProjectionTransform * float4(in.position, 1.0);
    out.texcoord = in.texcoord;
    out.color = custom.color;
    return out;
}

fragment float4 textureFragment(VertexOut in [[ stage_in ]],
                               texture2d<float> texture [[ texture(0) ]]) {
    constexpr sampler defaultSampler;
    float4 color;
    color = texture.sample(defaultSampler, in.texcoord) + in.color;

    return color;
}
こちらを保存すると .metal ファイルを自動的に metallib に変換されて Scene Editor から呼び出せるような振る舞いになる。(と思っている)
Scene Editor でつくったカスタムシェーダーを設定してみる
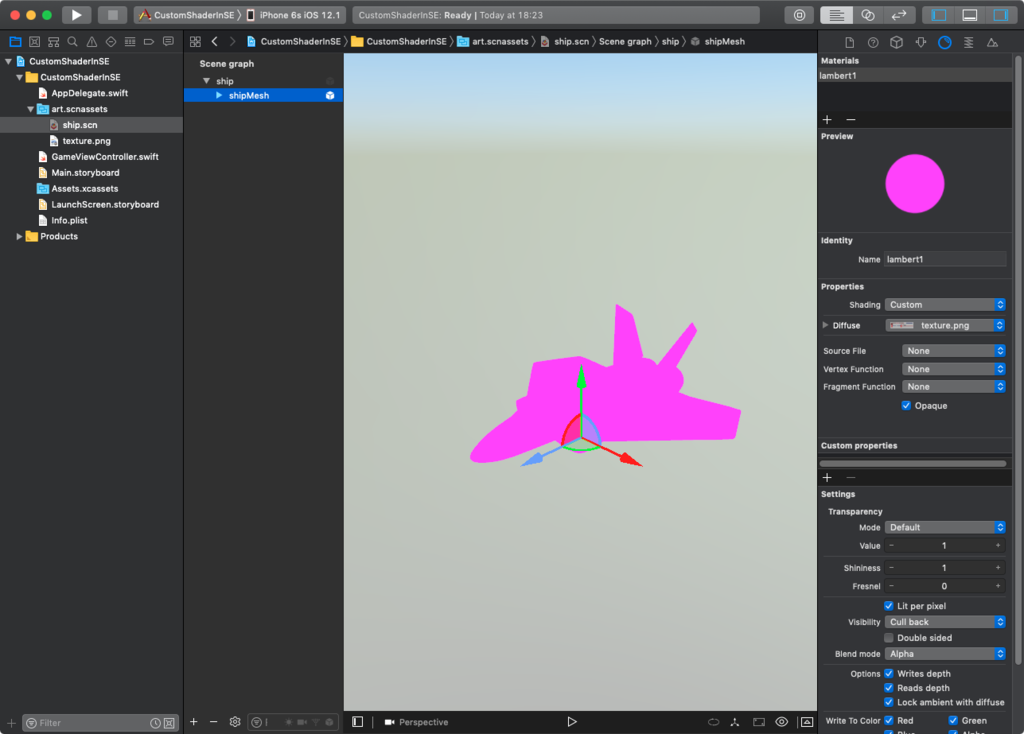
Scene Editor の Material Inspetor (Command + Option + 4) で Shading を Custom にすると
Diffuse、Source File、Vertex Function、Fragment Function と Opaque が設定できるようになる。

よくわからないが次開くと Diffuse の項目が設定できなくなる。謎。
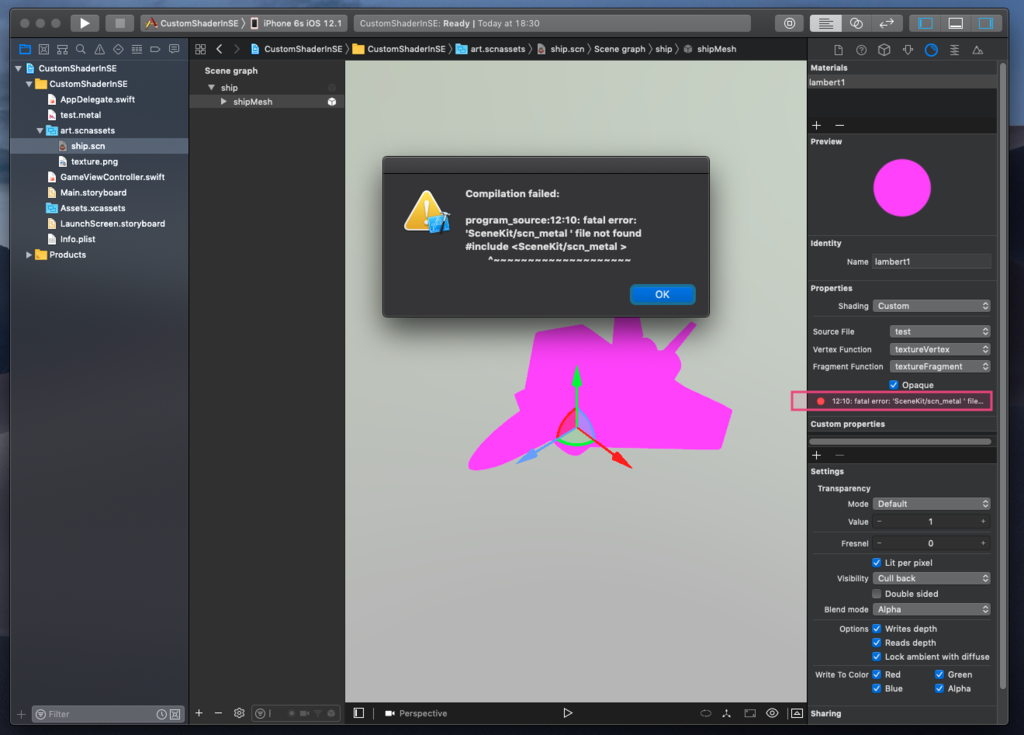
先ほど作成した metal を選択すると設定した Vertex Function、Fragment Function が選択できるのだが、「#include <SceneKit/scn_metal>」がインクルードできないとエラーが出てマテリアルがマゼンタピンクで塗りつぶされたままになる。

ということで、SceneKit フレームワークの scn_metal のヘッダーの記述を持っていこう。
「#include <SceneKit/scn_metal>」の部分を以下のコードに変えてみる。
一応、ヘッダの記述全てを書いたが全て使う必要はないのいらないものは消してもよいと思われる、
enum {
    SCNVertexSemanticPosition,
    SCNVertexSemanticNormal,
    SCNVertexSemanticTangent,
    SCNVertexSemanticColor,
    SCNVertexSemanticBoneIndices,
    SCNVertexSemanticBoneWeights,
    SCNVertexSemanticTexcoord0,
    SCNVertexSemanticTexcoord1,
    SCNVertexSemanticTexcoord2,
    SCNVertexSemanticTexcoord3,
    SCNVertexSemanticTexcoord4,
    SCNVertexSemanticTexcoord5,
    SCNVertexSemanticTexcoord6,
    SCNVertexSemanticTexcoord7
};

struct SCNSceneBuffer {
    float4x4    viewTransform;
    float4x4    inverseViewTransform; // transform from view space to world space
    float4x4    projectionTransform;
    float4x4    viewProjectionTransform;
    float4x4    viewToCubeTransform; // transform from view space to cube texture space (canonical Y Up space)
    float4x4    lastFrameViewProjectionTransform;
    float4      ambientLightingColor;
    float4        fogColor;
    float3        fogParameters; // x:-1/(end-start) y:1-start*x z:exp
    float2      inverseResolution;
    float       time;
    float       sinTime;
    float       cosTime;
    float       random01;
    float       motionBlurIntensity;
    // new in macOS 10.12 and iOS 10
    float       environmentIntensity;
    float4x4    inverseProjectionTransform;
    float4x4    inverseViewProjectionTransform;
    // new in macOS 10.13 and iOS 11
    float2      nearFar; // x: near, y: far
    float4      viewportSize; // xy:size, zw:origin
    // new in macOS 10.14 and iOS 12
    float4x4    inverseTransposeViewTransform;

    // internal, DO NOT USE
    float4      clusterScale; // w contains z bias
};
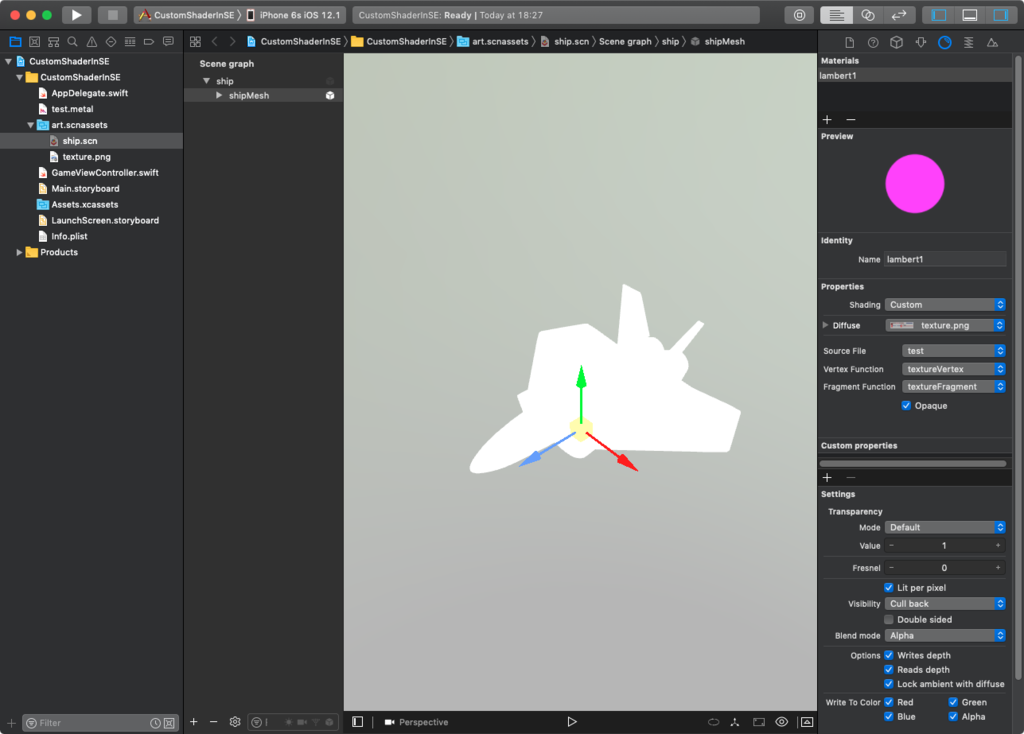
これで動くかと思ったが、Diffuse が消えてしまうため外部からテクスチャを取る手段がなくテクスチャは割り当てられない。
ドキュメントがないのでバグなのか仕様なのかわからない。

諦めて Fragment Shader だけ設定してみる
ということで、書き直ししてみることにする。
フラグメントの return で float4(1.0, 0.0, 0.0, 1.0) に設定しているためマテリアルが真っ赤になる。
fragment float4 textureFragment(VertexOut in [[ stage_in ]],
                               texture2d<float> texture [[ texture(0) ]]) {
//    constexpr sampler defaultSampler;
//    float4 color;
//    color = texture.sample(defaultSampler, in.texcoord) + in.color;

    return float4(1.0, 0.0, 0.0, 1.0);
}

ちなみに SCNSceneBuffer で定義されているものは使用可能なので呼び出してみる。
以下の VertexOut の構造体と vertex、fragment を修正。
再生ボタンを押したり、カメラ移動させたりすると Scene Editor のフレームがすすみランダムで赤く点滅する。
struct VertexOut {
    float4 position [[ position ]];
    float2 texcoord;
    float4 color;
    float random01;
};

vertex VertexOut textureVertex(VertexInput in [[ stage_in ]],
                               constant SCNSceneBuffer& scn_frame [[ buffer(0) ]],
                               constant NodeBuffer& scn_node [[ buffer(1) ]],
                               constant CustomBuffer& custom [[ buffer(2) ]]) {
    VertexOut out;
    out.position = scn_node.modelViewProjectionTransform * float4(in.position, 1.0);
    out.texcoord = in.texcoord;
    out.color = custom.color;
    out.random01 = scn_frame.random01;
    return out;
}

fragment float4 textureFragment(VertexOut in [[ stage_in ]],
                               texture2d<float> texture [[ texture(0) ]]) {
//    constexpr sampler defaultSampler;
//    float4 color;
//    color = texture.sample(defaultSampler, in.texcoord) + in.color;

    VertexOut out = in;
    float random = out.random01;

    return float4(random, 0.0, 0.0, 1.0);
}
サンプルファイル
まとめ
軽く触った感じではテクスチャの設定方法がわからないが、Metal シェーダーを Scene Editor で試すことができるため、わざわざビルドしなくても済む。
動作チェックが手軽になるかと思われる。